
A real pattern excerpt
 12345
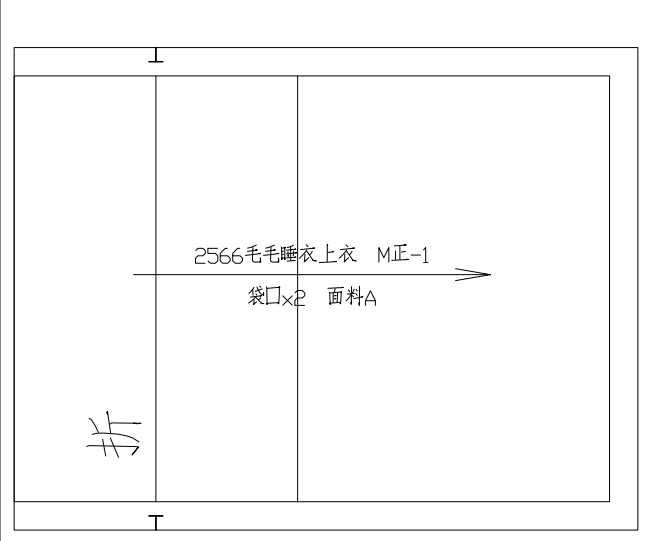
- Size M is printed in the piece label; this is a single-size sheet.
- Outer outline: locate the cut edge before following the inner line.
- Inner reference line: check the instructions for its purpose and allowance. Line spacing alone is not a seam-allowance specification.
- Grain arrow: keep both ends the same distance from the selvedge.
- Fold mark (折): this pocket-opening piece turns at a marked fold. A turn-back fold is different from an instruction to cut an edge on the fabric fold.
This excerpt is from the size M pocket-opening piece in 2566, PDF page 1. Use its numbered key to locate the printed size, outer cut edge, inner reference line, grain arrow and fold mark. It is shown for reading marks, not at cutting scale. This single-size piece has one outline; multi-size line styles and notch meanings still come from the legend in your own file.
Find the cutting line and stitching line
A multi-size pattern may use different line styles for different sizes. Trace the chosen size consistently through corners and overlapping lines. The outermost line is not necessarily your size.
Check whether seam allowances are included. Some patterns draw both a cutting line and a stitching line; others show only one. A hem may use a different allowance from the side seam. Do not add a standard allowance to every edge until the instructions tell you what is already there.
Keep fold lines and grainlines separate
A cut-on-fold mark tells you to put that edge on an uncut fabric fold. When the piece is opened, the two halves remain joined. Do not cut through the fold unless the pattern explicitly calls for an opening there.
A grainline arrow usually controls alignment with the lengthwise grain. Measure from each end of the arrow to the same selvedge so the distances agree. Bias-cut pieces and directional prints require their stated layout; do not rotate a piece just because it fits a gap.
Read each mark as an action
- Notch: match it to the corresponding notch on the joining piece. Single and double notches are common, but their meaning comes from this pattern's legend.
- Dot or cross: transfer the location; it may identify a dart end, pocket corner or sewing start and stop point.
- Dart legs and tip: transfer both legs and the tip so the fold and stitching line can be matched.
- Cut quantity: count fabric, lining and interfacing separately. “Cut two” and “cut one on fold” do not produce the same pieces.
Test chalk, pen or thread marking on a scrap. If you snip a notch, keep it short enough to remain inside the seam allowance without approaching the stitching line. Mark outward if that is easier to see and handle.
Make a mirrored pair deliberately
For pieces that must form a mirrored pair when cut in a single layer, keep the same face of the fabric upward for both cuts. Cut one with the paper face up, then flip the paper face down for the second. Turning it around on the table without flipping it does not mirror the shape.
Check the grainline and one-way print again after flipping. This applies to required pairs, not to every pattern piece. An asymmetric piece may deliberately be cut only once.
Do a final cutting check
Transfer every required mark before lifting the paper, then check that it remains visible on the fabric. Count outer fabric, lining and interfacing against the cutting list. Label piece names, sizes and wrong sides, and confirm that required pairs are mirrored before clearing the table.
Frequently asked questions
Must the raw edges of two curved pieces be the same length?
Not always. Compare the stitching lines and any ease instructions. Curved seam allowances can make raw-edge lengths differ even when the seam lines match.
How do I trace a size where several curves overlap?
Find a clear section of your size line on each side of the overlap. Follow its line style into the crowded area, marking short sections as you go. Compare the result with the size key before joining the sections. If you cannot distinguish a line, enlarge the PDF view or use its size layers when available; keep registration marks visible.