Before the first stitch
- 40 cm (15.75 in) of 110 cm (43.31 in)-wide woven fabric; gauze works well for this project.
- Optional: 40 cm (15.75 in) of batting if extra thickness is wanted. Check its width against the body piece.
- One matching snap set, its compatible fitting tool, thread and optional eye appliques.
Piece checklist
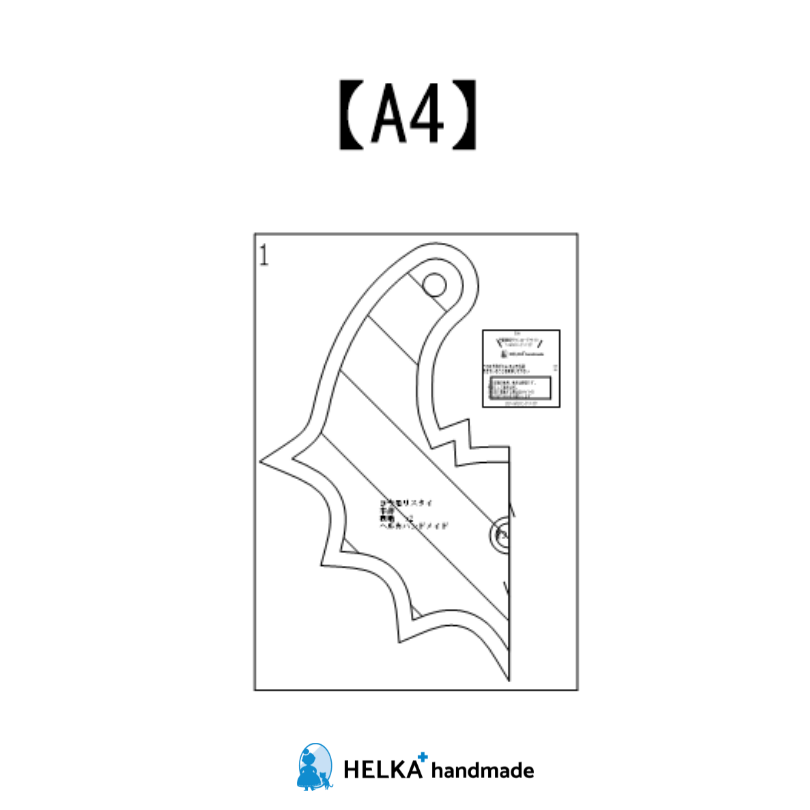
- Body: cut 2 main fabric pieces on fold
Print and assemble the pattern
Print on A4 at actual size / 100%, with page fitting disabled. First print a calibration page and check that its square measures 5 × 5 cm (1.97 × 1.97 in). Print the remaining pages only after checking the scale. Keep every outline, notch and fold mark.
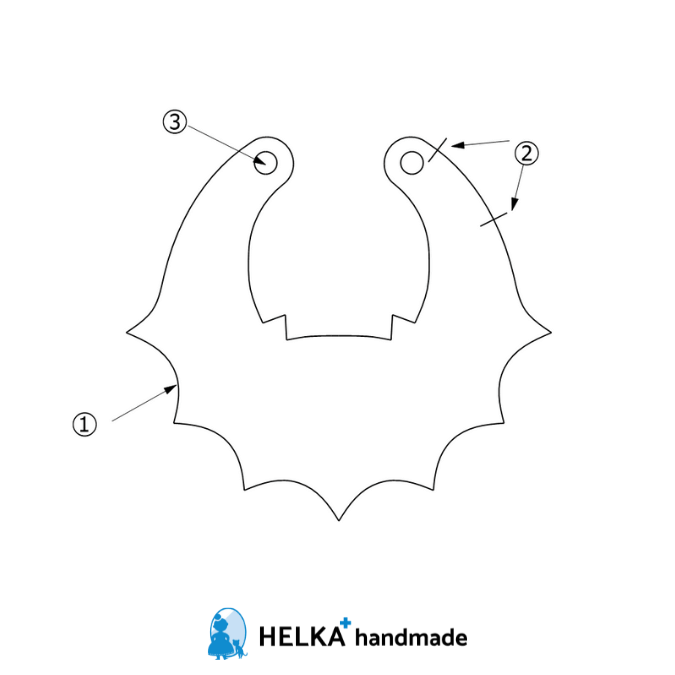
The bib is one A4 sheet with no tiled assembly. Cut two body layers on the fold. Compare the complete printed bib with the size you need before cutting.
1. Sew the body layers
If you are adding batting, place one batting layer against the wrong side of one body piece. Put the two fabric pieces right sides together and stitch through the stack. After turning, the batting will sit between the fabric layers.
Place body layers right sides together and sew around with a 1 cm (0.39 in) seam, leaving the opening marked ②.
2. Trim the allowance
Trim the seam allowances to 0.5 cm (0.20 in) to help the bib turn neatly.
3. Turn and close the opening
Turn right side out through opening ②, then close it by hand.
4. Fit the snap
Install the snap at the circles marked ③; securely attach optional eye appliques.
Final checks
Check that the turning gap is closed, wing points are fully turned and the snap is secure and opens cleanly.
Original pattern and diagrams: Helka Handmade. Tutorial adapted by Patternly, with permission.