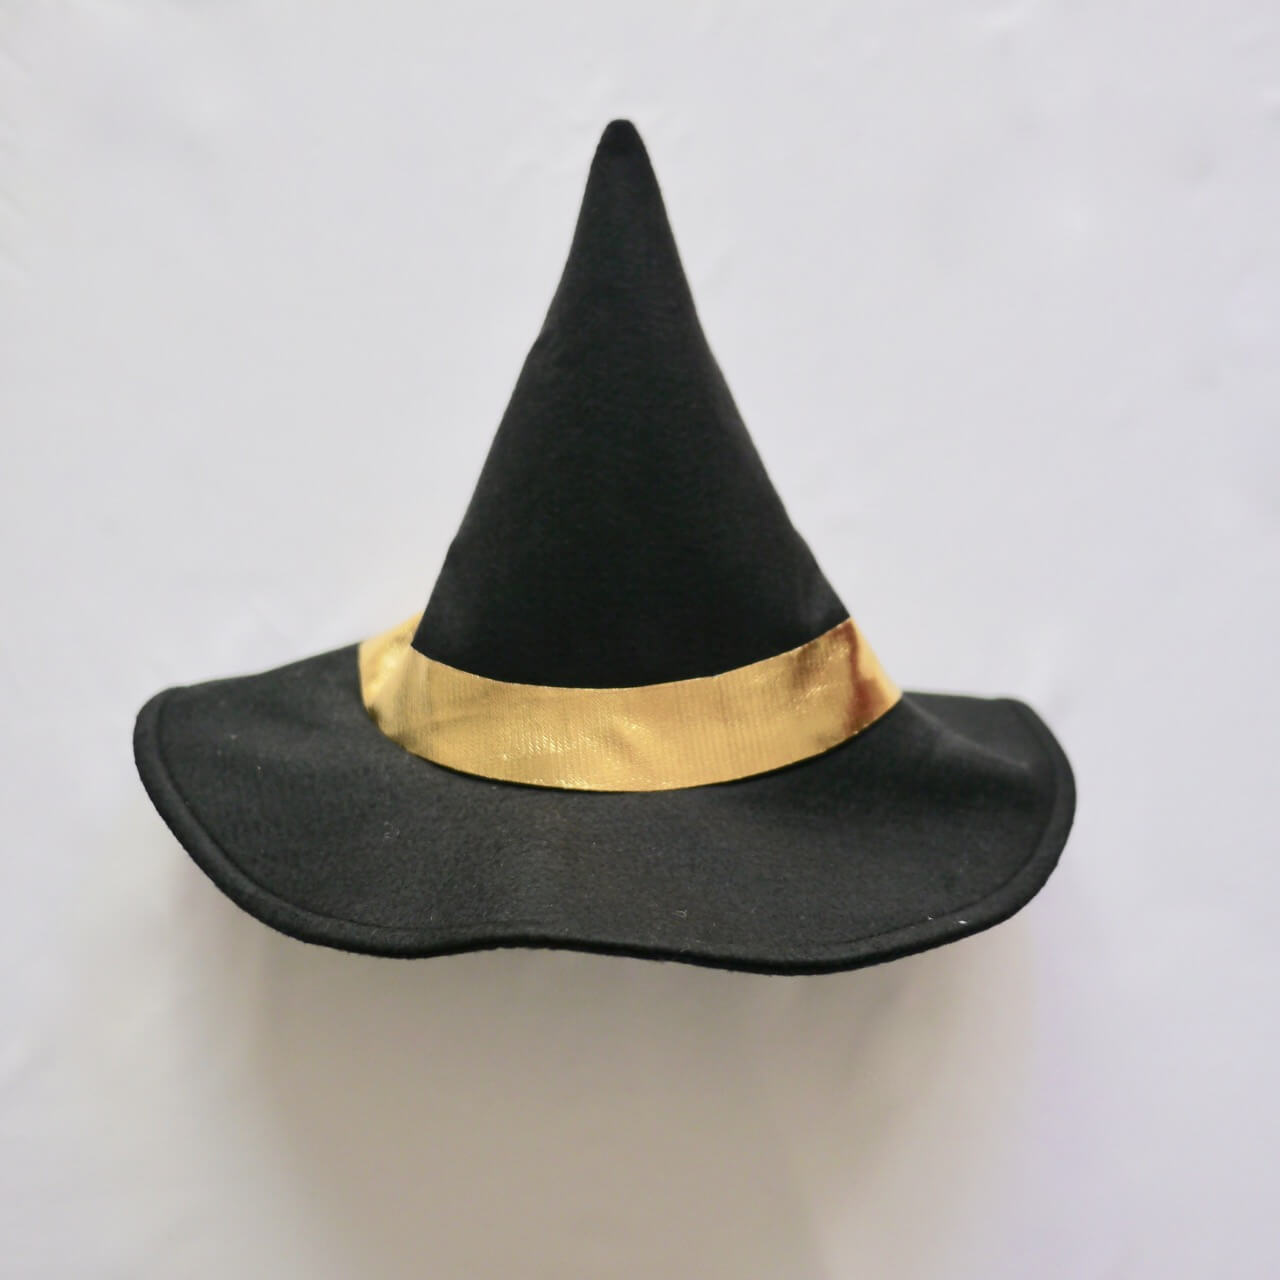
Before the first stitch
- Black felt for the body and tabs, contrasting felt for the two collar layers, and two interfacing pieces for the tabs.
- The original material list has three 60 × 60 cm (23.62 × 23.62 in) sheets; its three-area layout labels 70 × 60 cm (27.56 × 23.62 in). Arrange the chosen pieces before buying and cutting. The guide makes a single-layer cape body, without a separate full lining.
- Matching thread and one snap closure; you can also use a button and buttonhole.
Piece checklist
- Back: cut 1 main fabric on fold
- Front: cut 2 main fabric
- Collar: cut 2 contrast fabric on fold
- Tabs: cut 4 main fabric and 2 interfacing
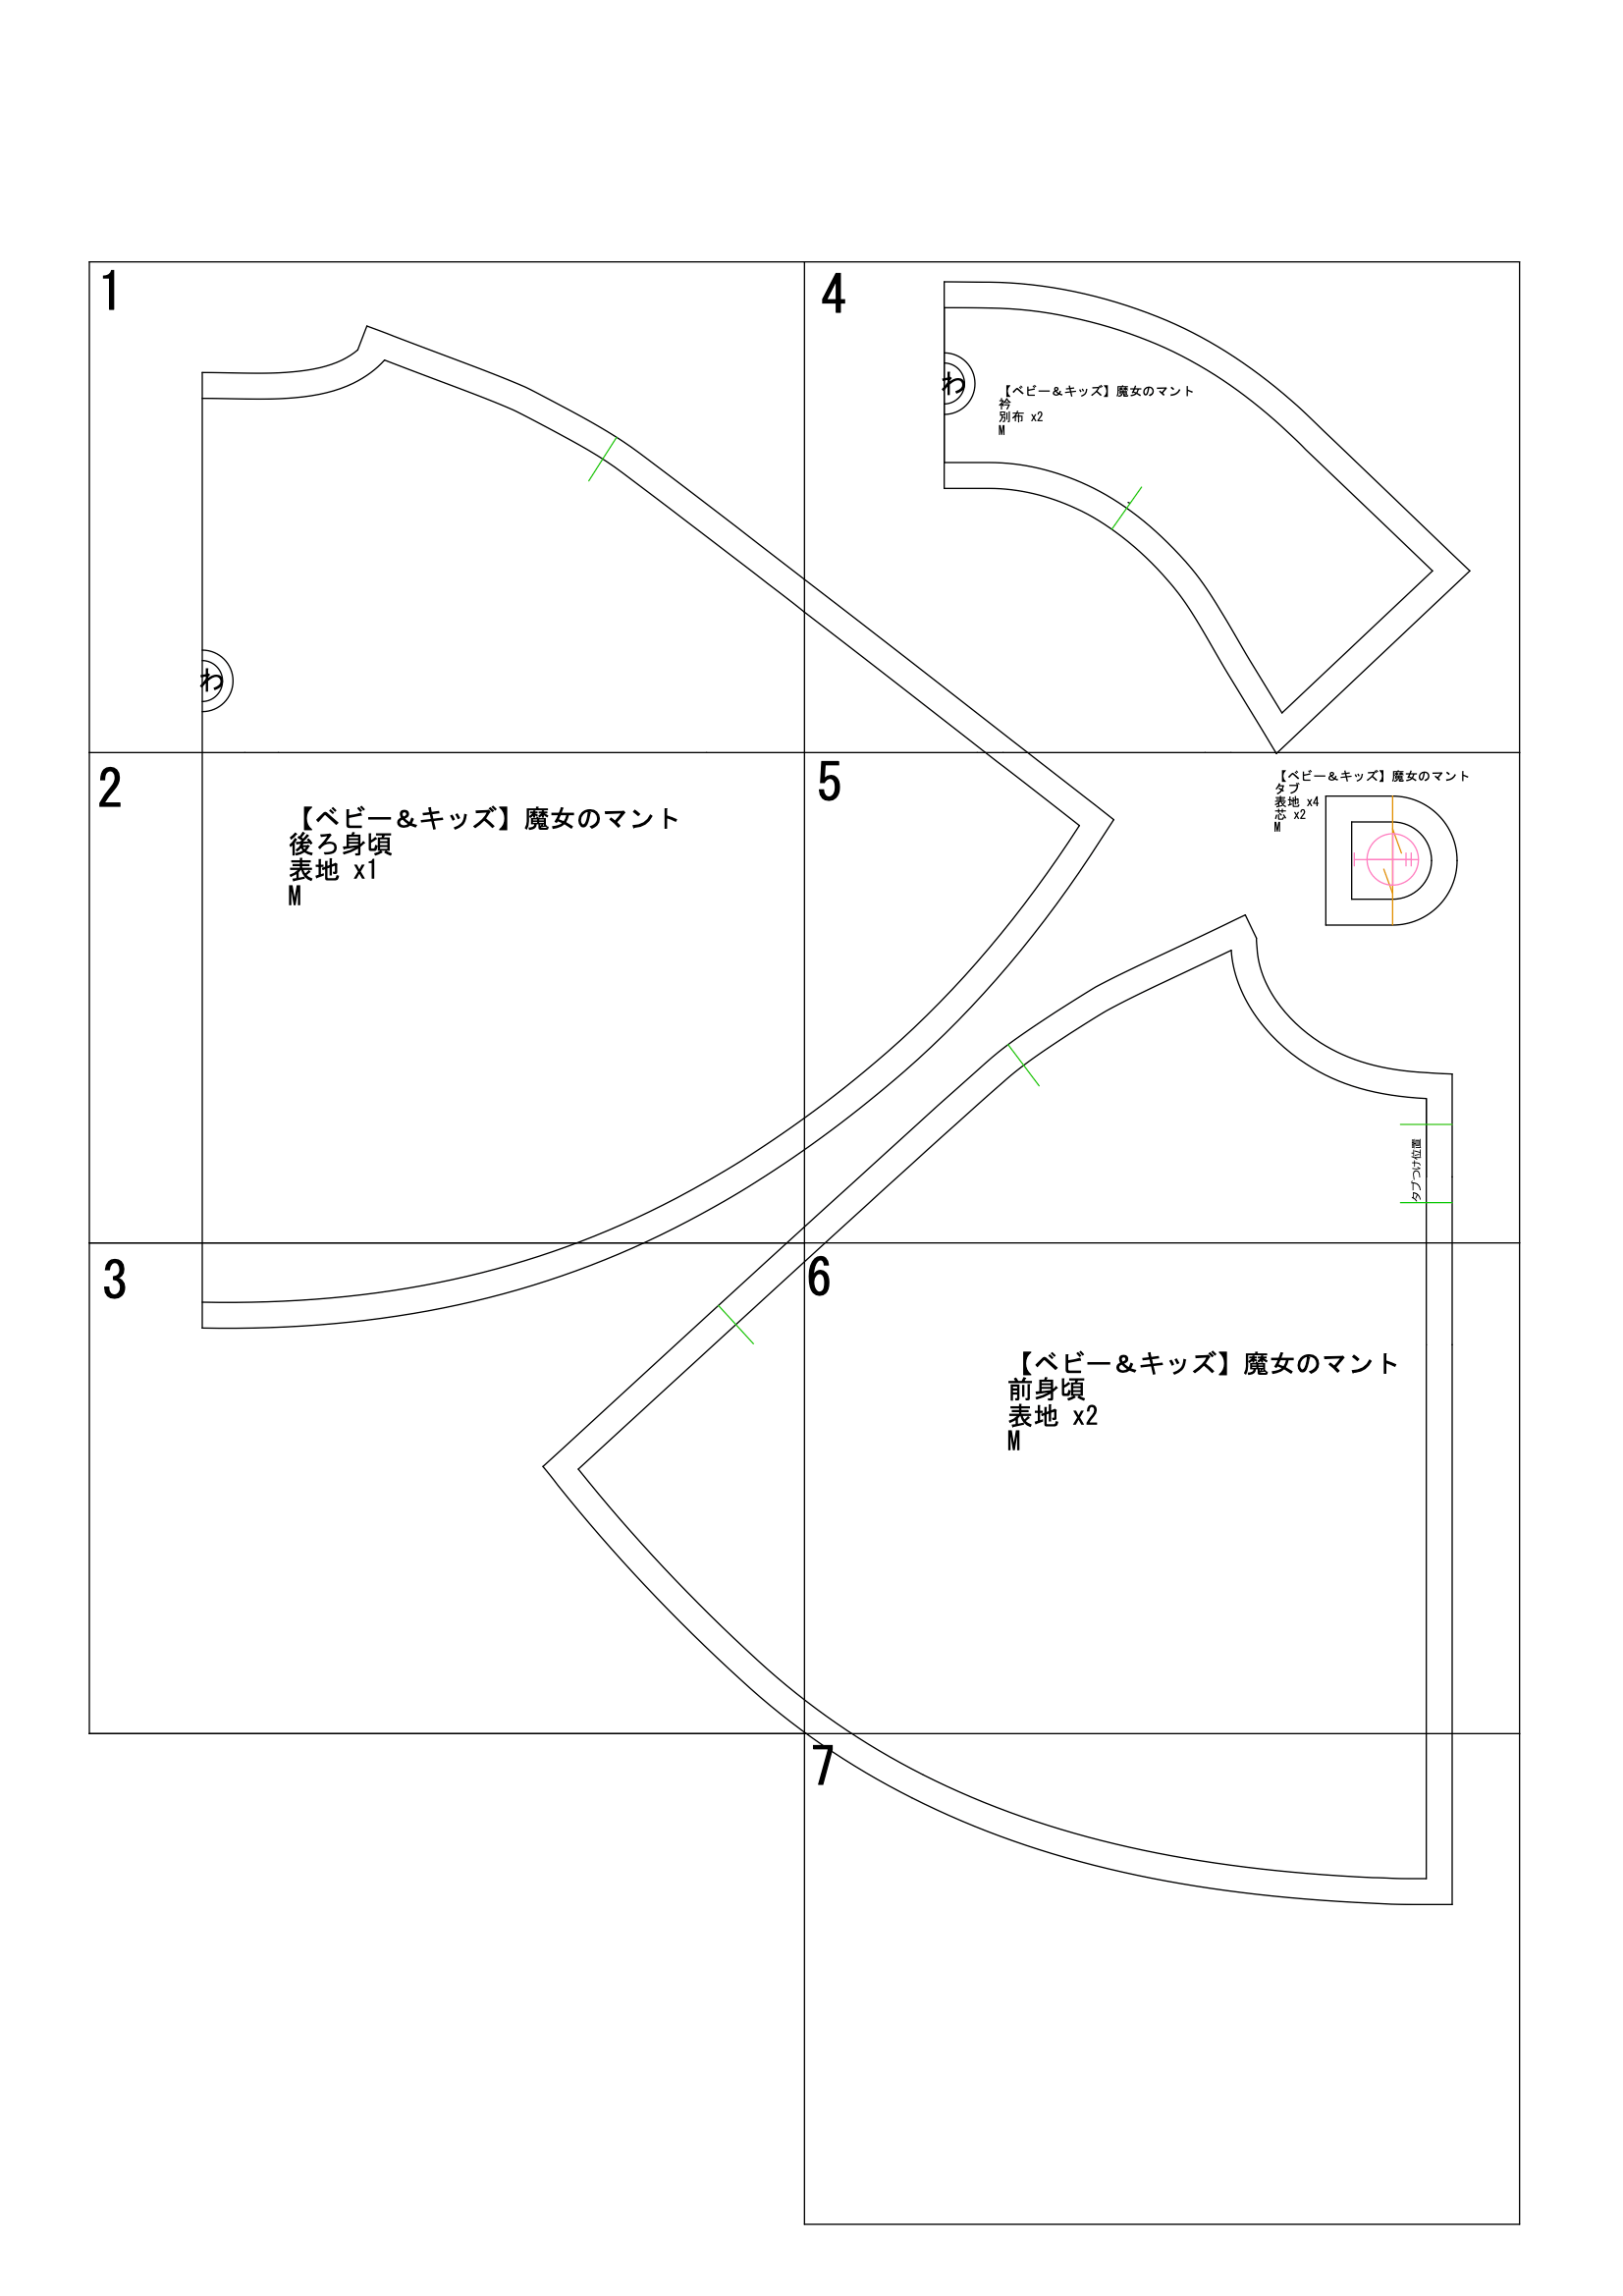
Print and assemble the pattern
Print on A4 at actual size / 100%, with page fitting disabled. First print a calibration page and check that its square measures 5 × 5 cm (1.97 × 1.97 in). Print the remaining pages only after checking the scale. Keep every outline, notch and fold mark.
Use all seven A4 sheets. The pattern comes in free size 90–110. Arrange 1–3 down the left, 4–7 down the right. Back and front pieces cross several sheet boundaries; assemble the entire outline before separating them. The collar on page 4 and tabs on page 5 are separate pieces. The finished length is 35.5 cm (13.98 in) from the neckline seam to the hem, excluding the collar.
1. Join the shoulders
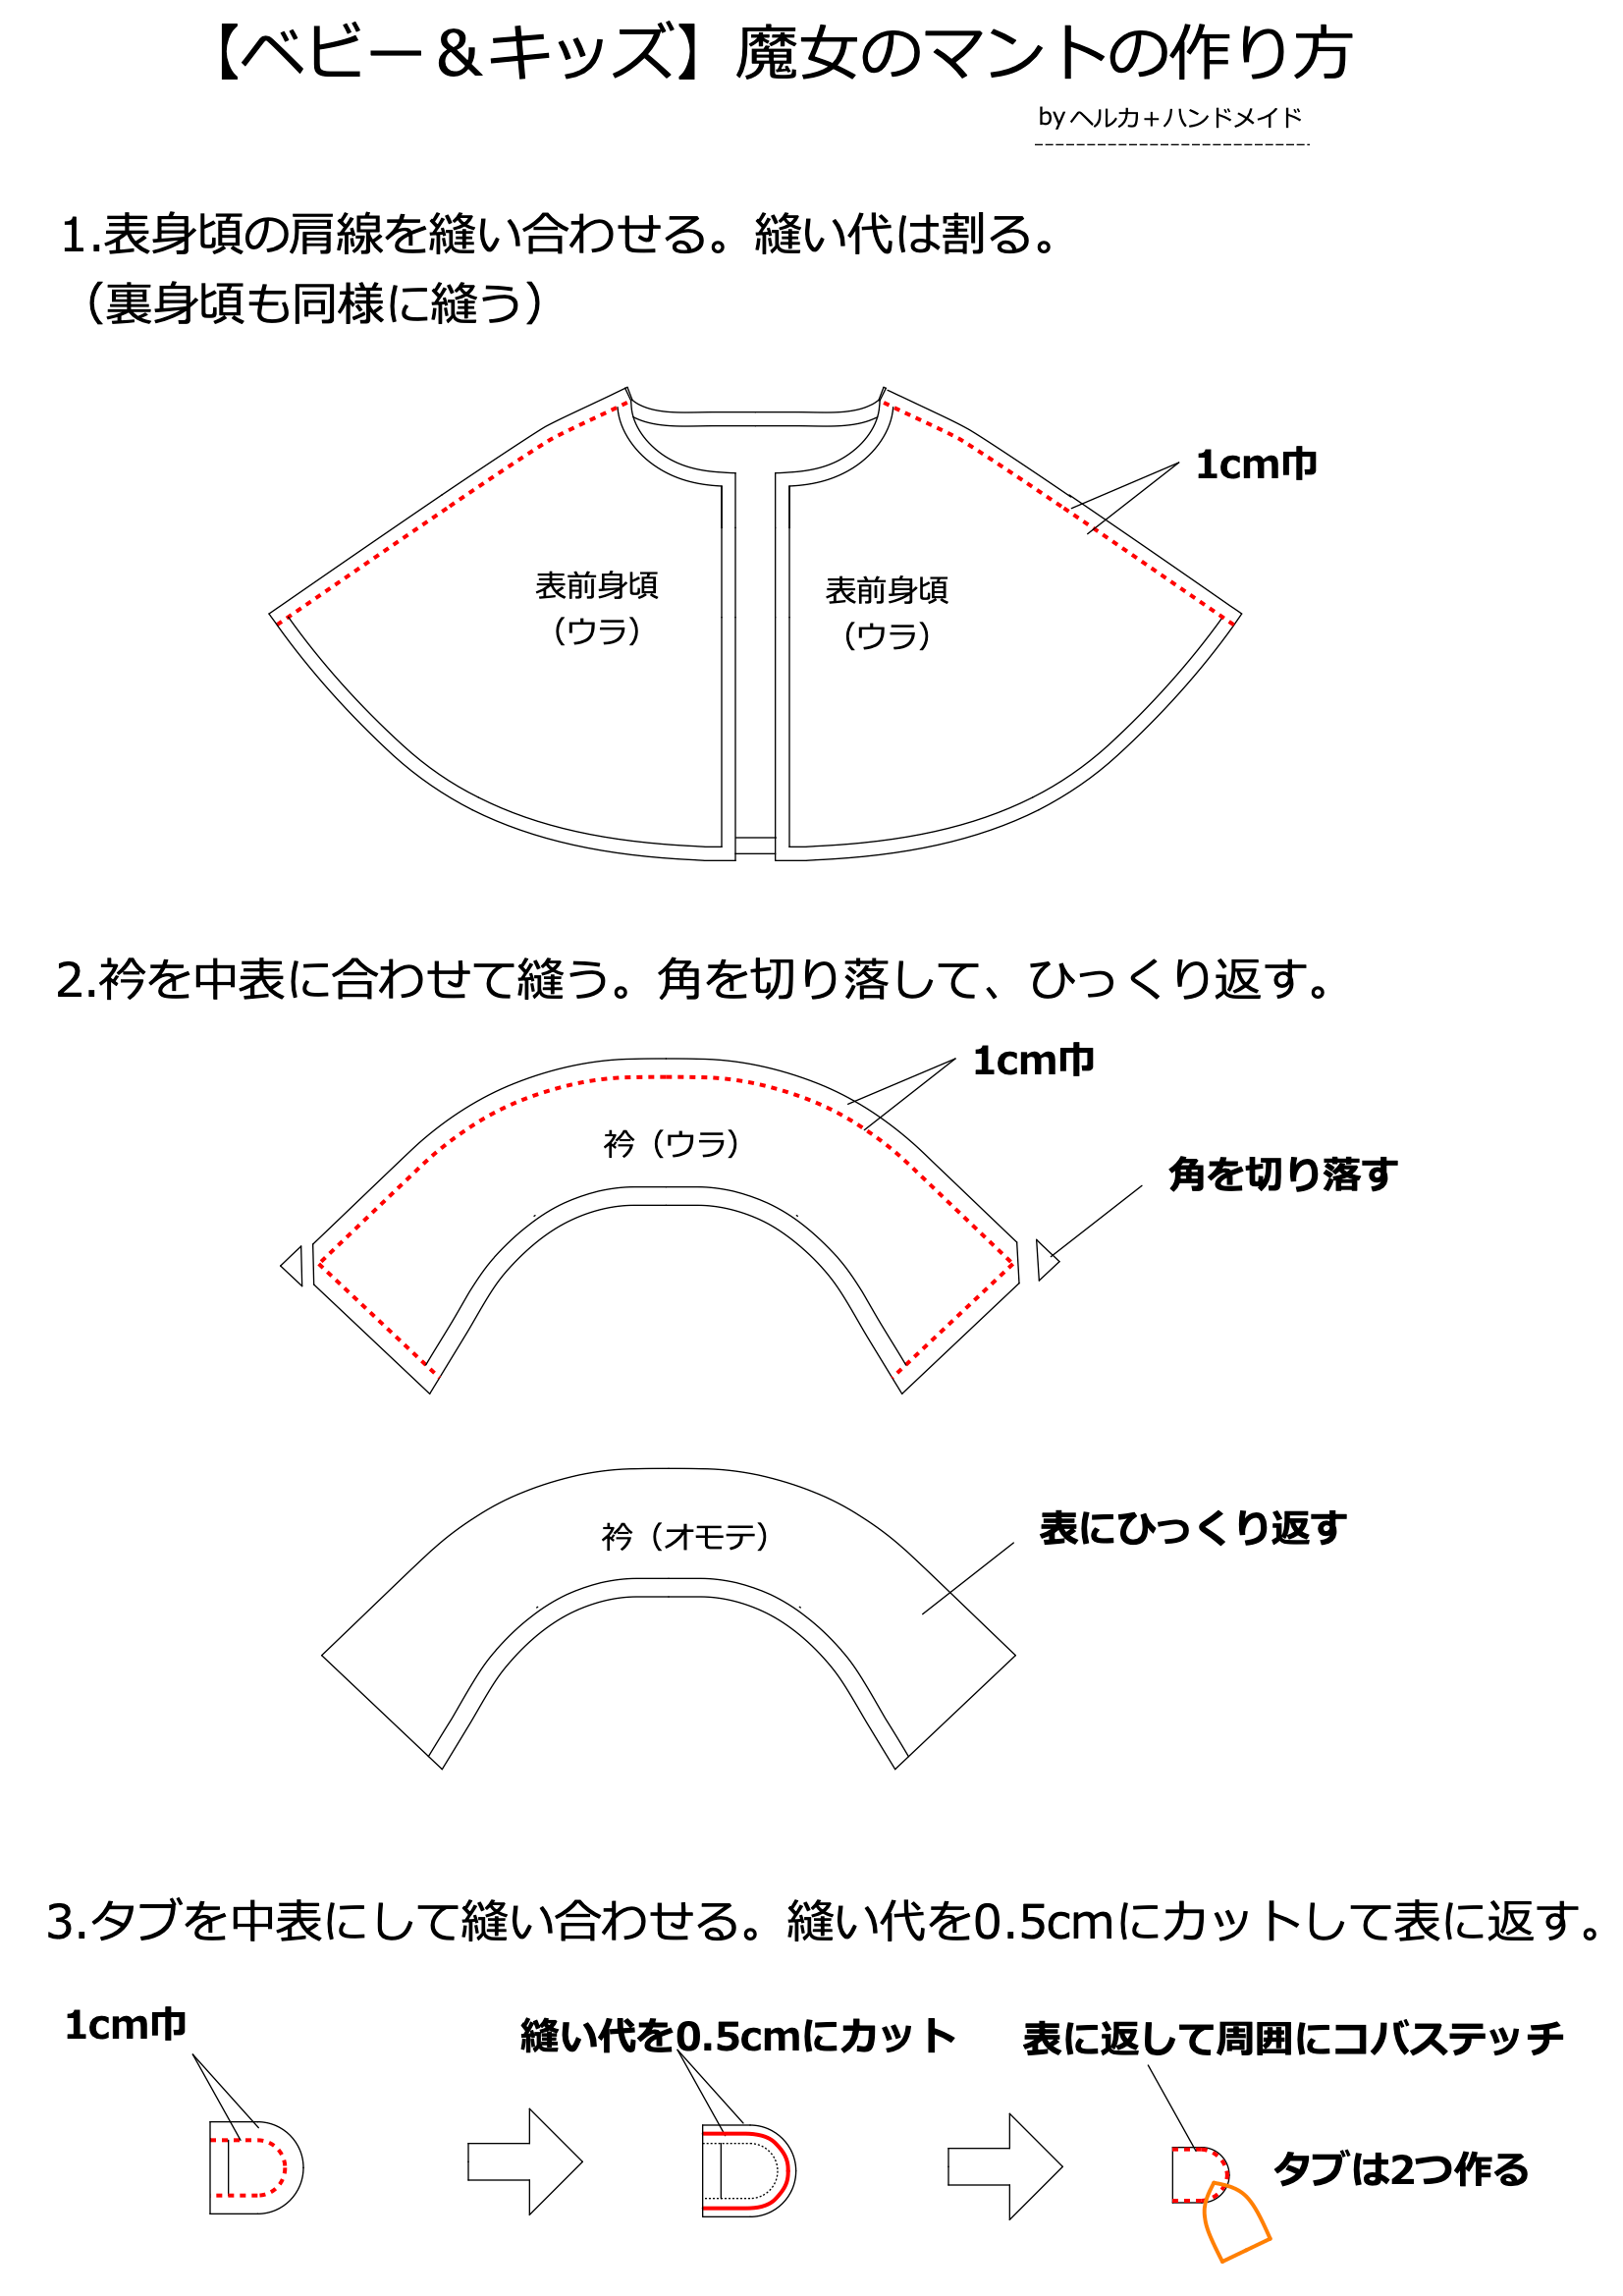
Place the front and back shoulders right sides together, sew with a 1 cm (0.39 in) seam allowance and press the allowances open.
2. Make the collar
Place collar layers right sides together and sew the outer edge with a 1 cm (0.39 in) seam, leaving the neckline open; trim the corners and turn.
3. Make two closure tabs
Apply one interfacing piece to the wrong side of each of two tab pieces, following the instructions for your chosen interfacing. Pair each supported tab with an unsupported tab, right sides together.
For each of 2 tabs, sew two layers right sides together around the rounded edge with a 1 cm (0.39 in) seam, leaving the straight edge open; trim to 0.5 cm (0.20 in), turn and edgestitch.
4. Attach the collar
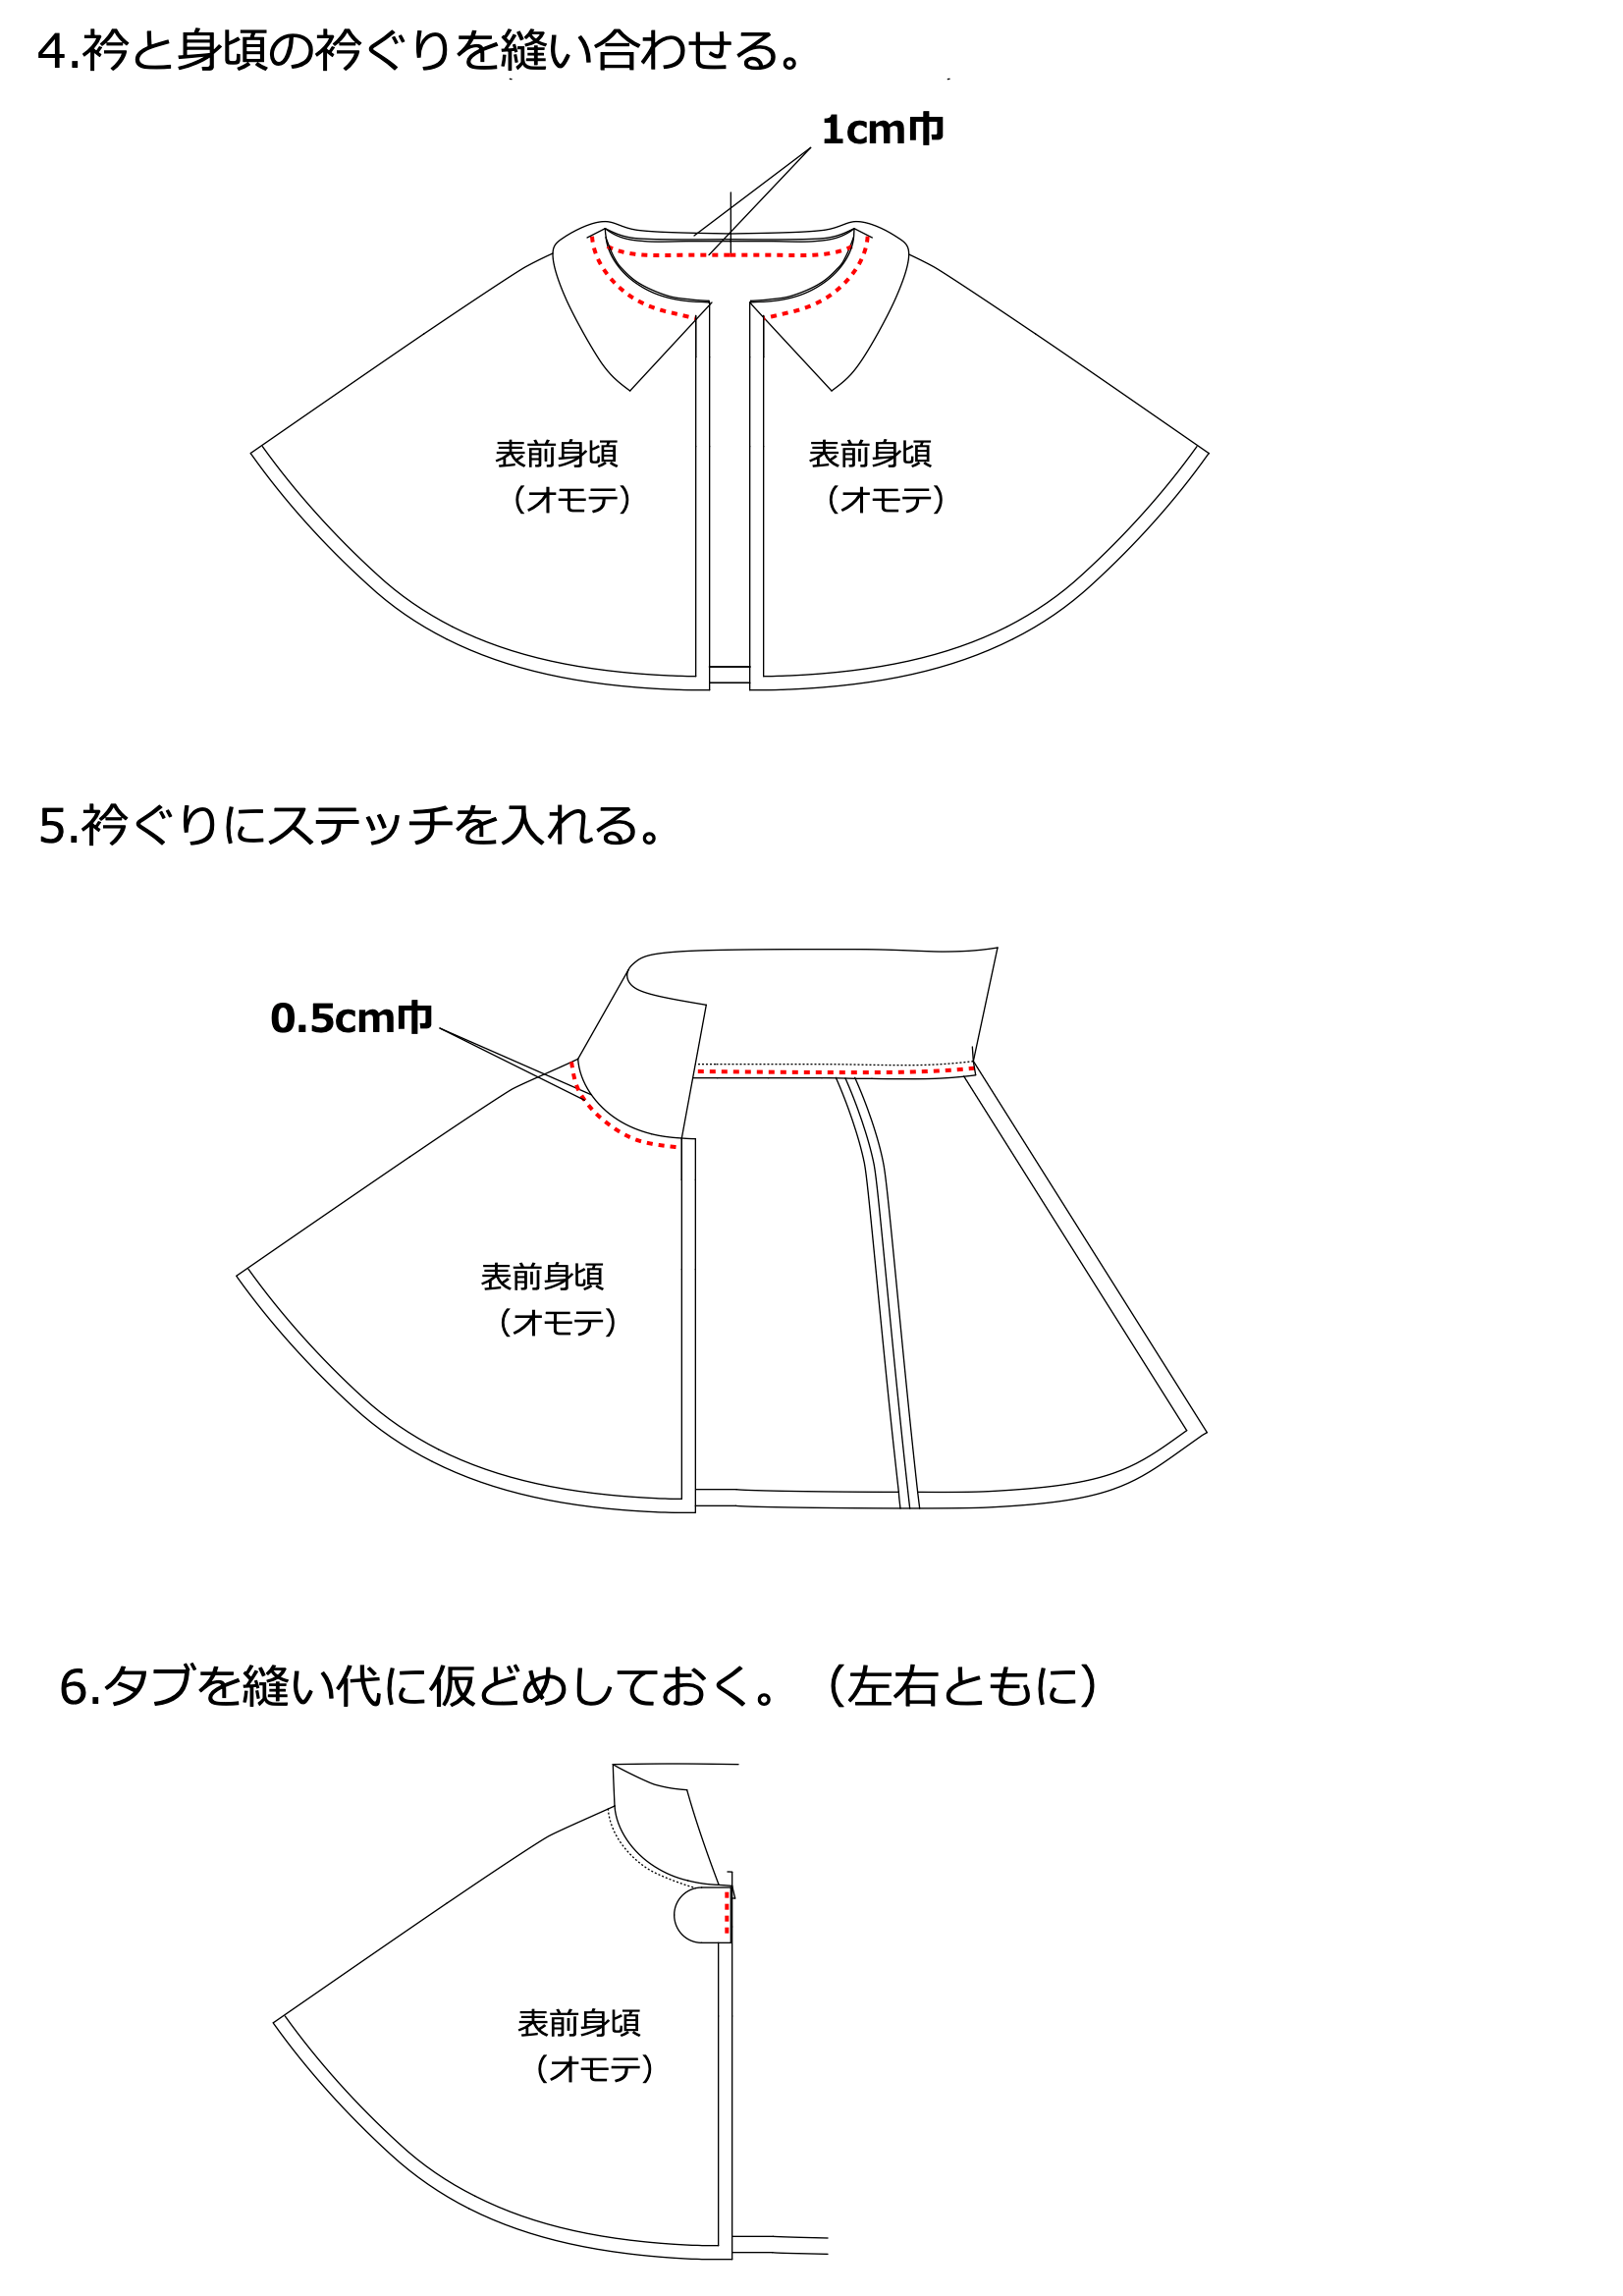
Join the collar to the cape neckline with a 1 cm (0.39 in) seam.
5. Topstitch the neckline
Topstitch 0.5 cm (0.20 in) from the neckline seam.
6. Baste the tabs
Baste each tab within the front-edge seam allowance at the marked position.
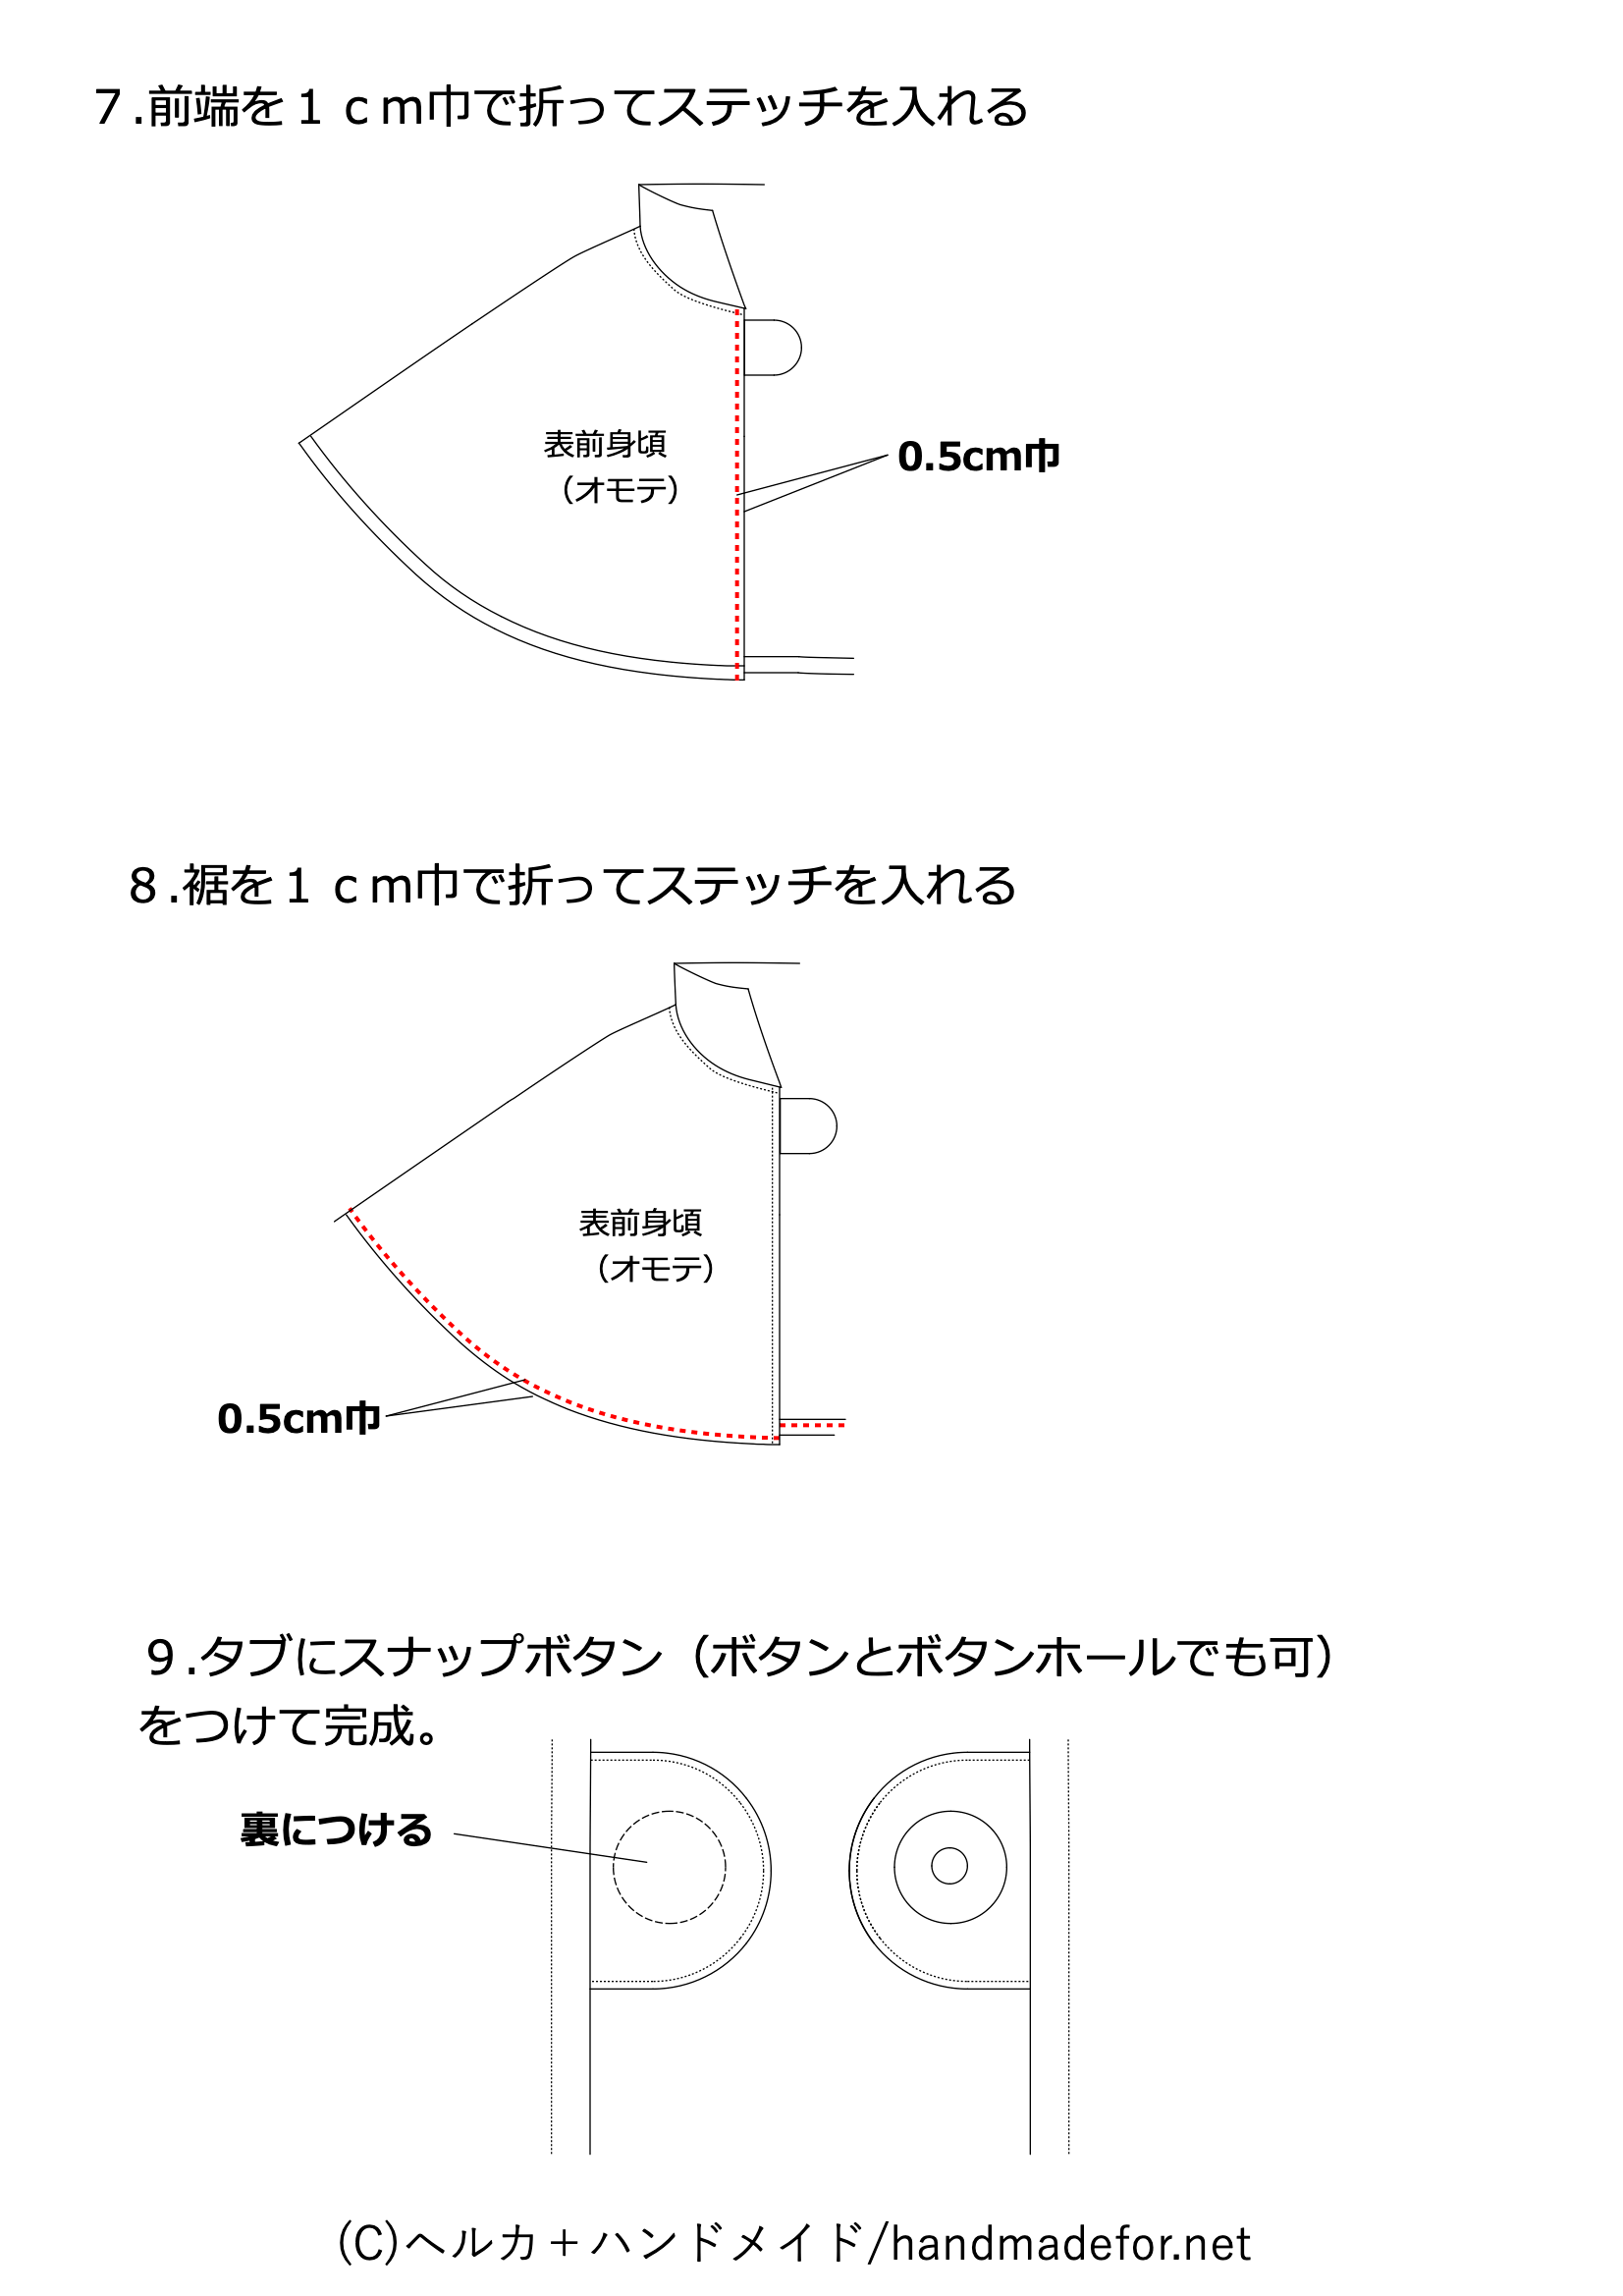
7. Finish the front edges
Turn each front edge under by 1 cm (0.39 in) and stitch 0.5 cm (0.20 in) from the folded edge.
8. Finish the hem
Turn the hem under by 1 cm (0.39 in) and stitch 0.5 cm (0.20 in) from the folded edge.
9. Fit the closure
Attach a matching snap to the inward-facing tab sides, or use a button and buttonhole.
Final checks
Check that seams and decorations are secure and the turned edges lie smoothly. Felt edges do not require overlocking.
Original pattern and diagrams: Helka Handmade. Tutorial adapted by Patternly, with permission.