Before the first stitch
- Orange felt for six crown panels, green felt for the two-layer stem, and black felt for the eyes, nose and mouth.
- The original material list has one 60 × 60 cm (23.62 × 23.62 in) main sheet, plus separate 18 × 18 cm (7.09 × 7.09 in) pieces for the stem and face. Its main cutting diagram instead labels 70 × 60 cm (27.56 × 23.62 in) and shows an 18 × 18 cm (7.09 × 7.09 in) decoration area. Lay out all pieces first, including both stem layers.
- Matching thread and fabric-compatible adhesive for the face.
Piece checklist
- Crown panel: cut 6 main fabric
- Stem decoration, two felt layers per tutorial
- Eye template (make two eyes)
- Nose template
- Mouth template
Print and assemble the pattern
Print on A4 at actual size / 100%, with page fitting disabled. First print a calibration page and check that its square measures 5 × 5 cm (1.97 × 1.97 in). Print the remaining pages only after checking the scale. Keep every outline, notch and fold mark.
Choose one single-page size: 80, 90, 100, 110 or 120. Check the crown opening on your printed pattern before cutting. Each crown panel is cut six times; no tile assembly is required. Choose the file named for the size you want to make.
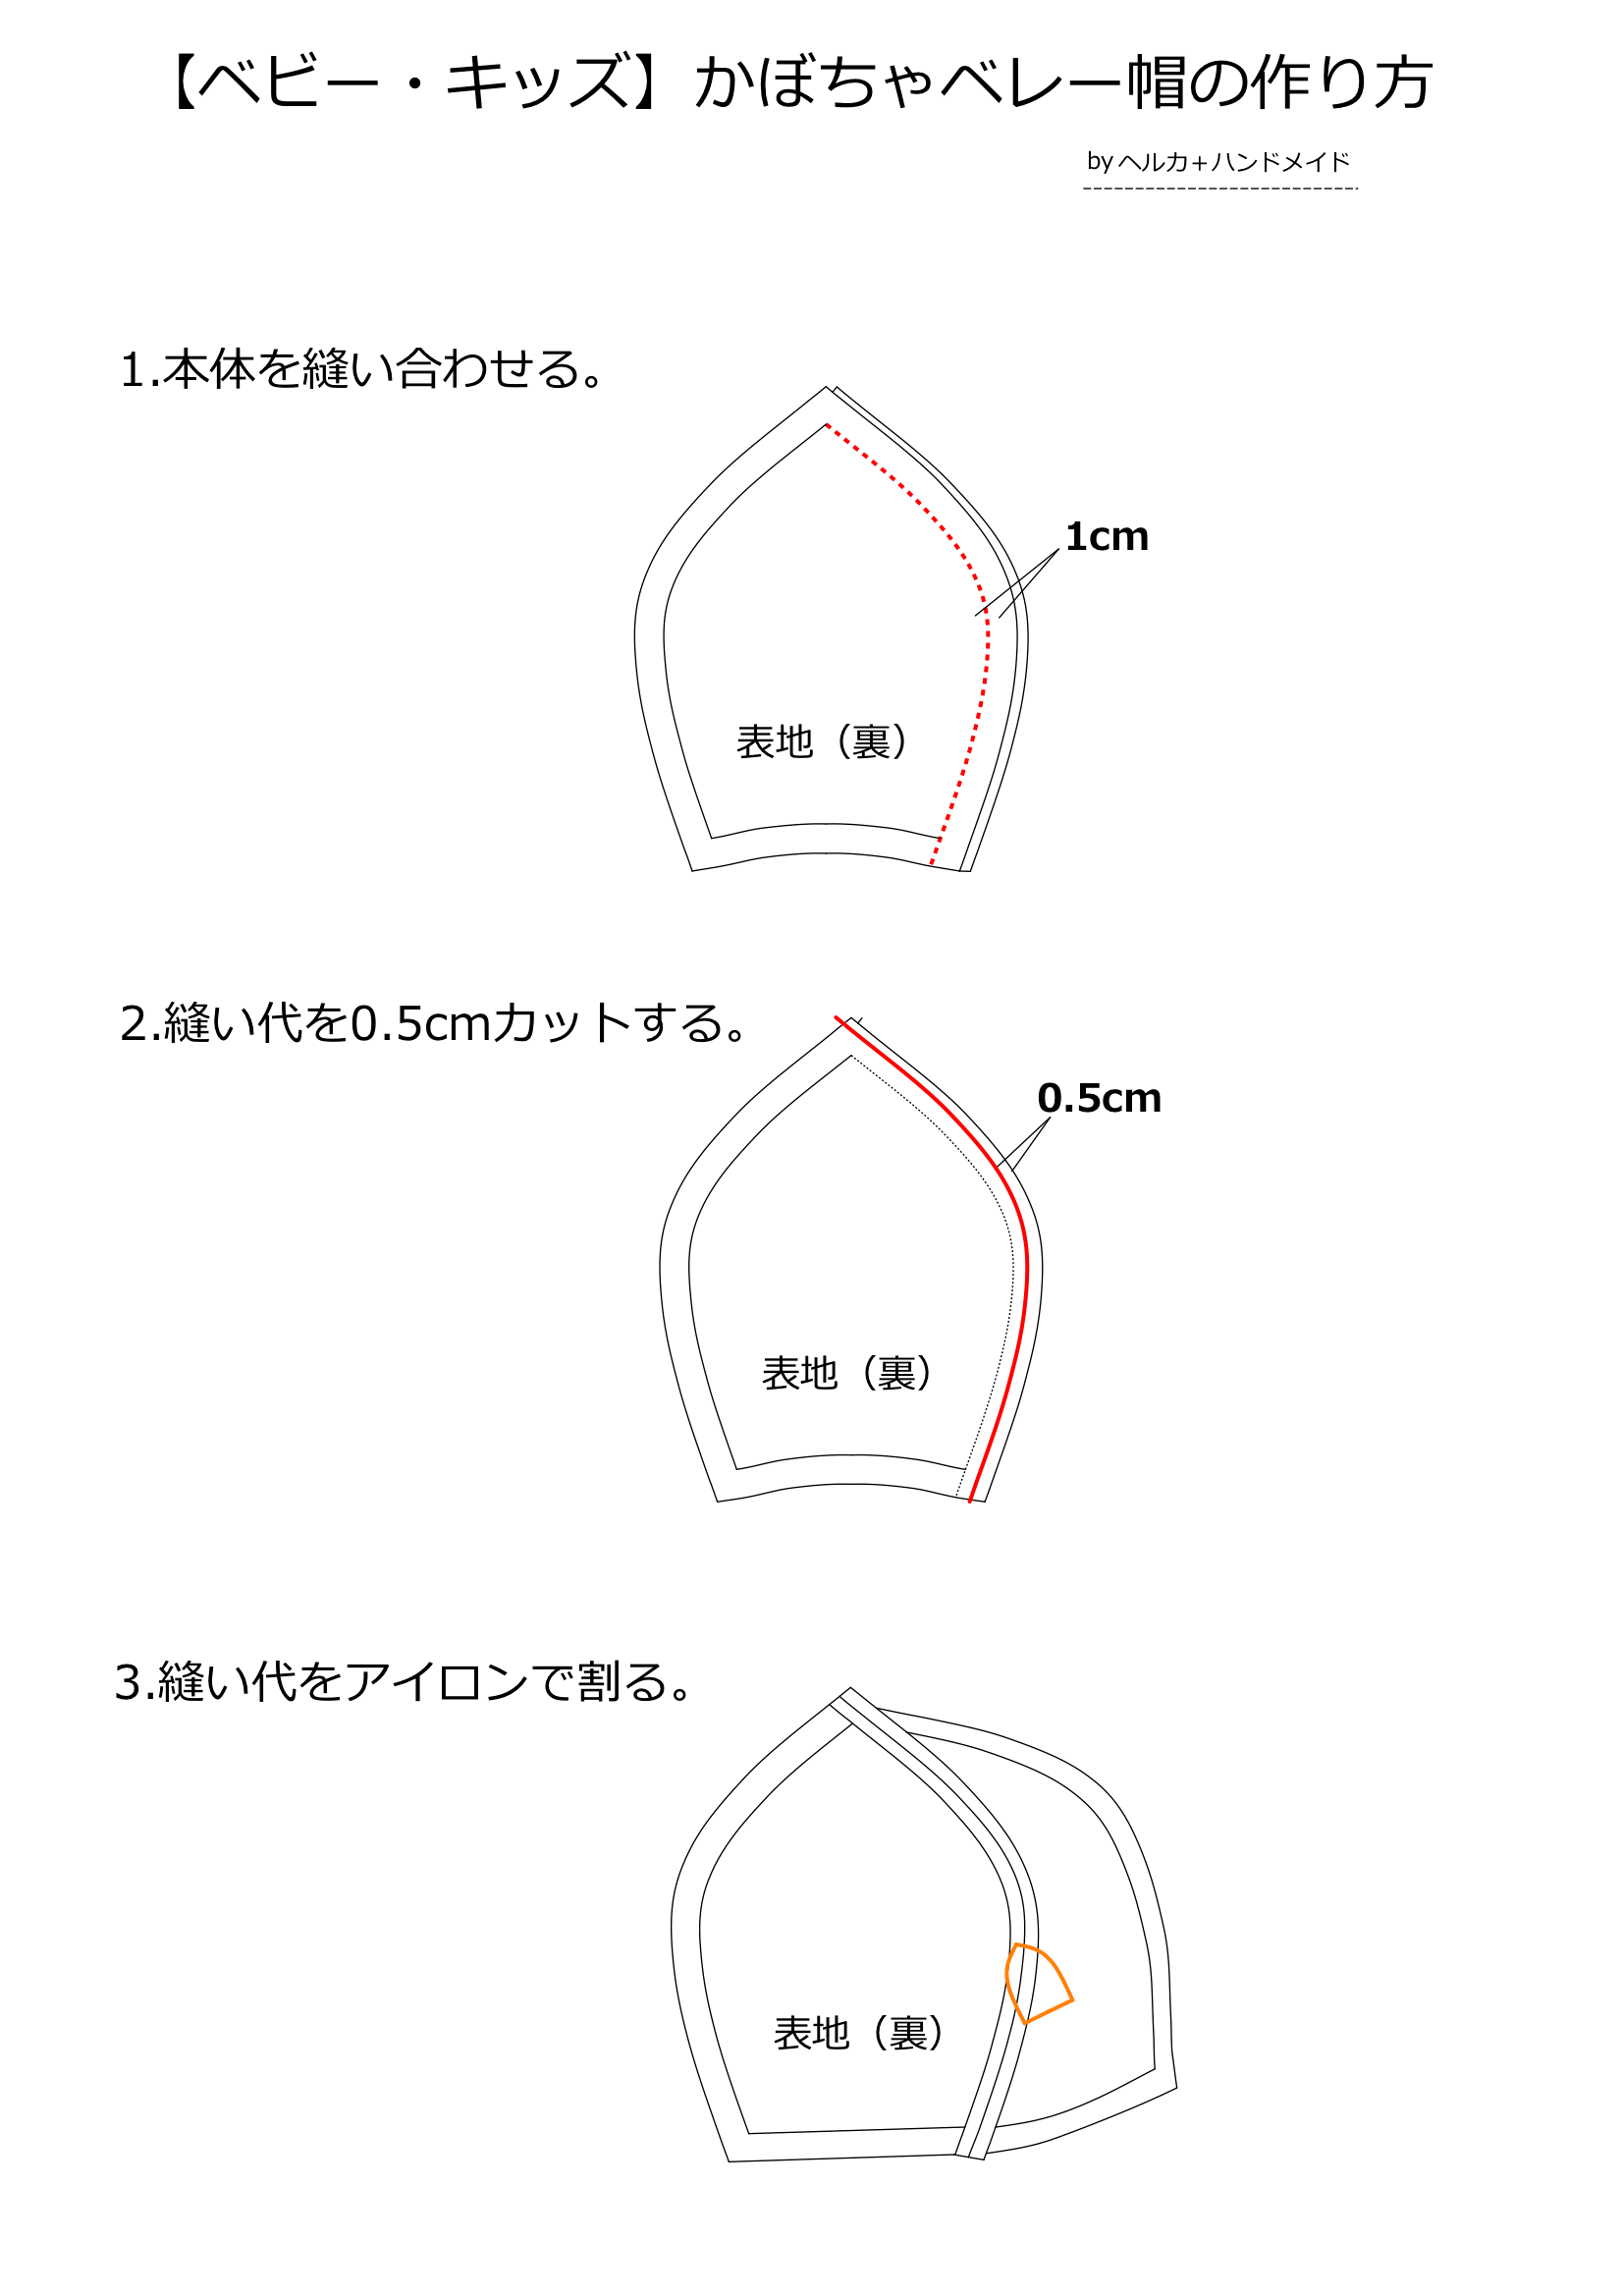
1. Sew the panel seams
Sew the crown panels right sides together along the curved sides with a 1 cm (0.39 in) seam.
2. Trim the allowances
Trim the seam allowances to about 0.5 cm (0.20 in).
3. Press the seams open
Press the seam allowances open.
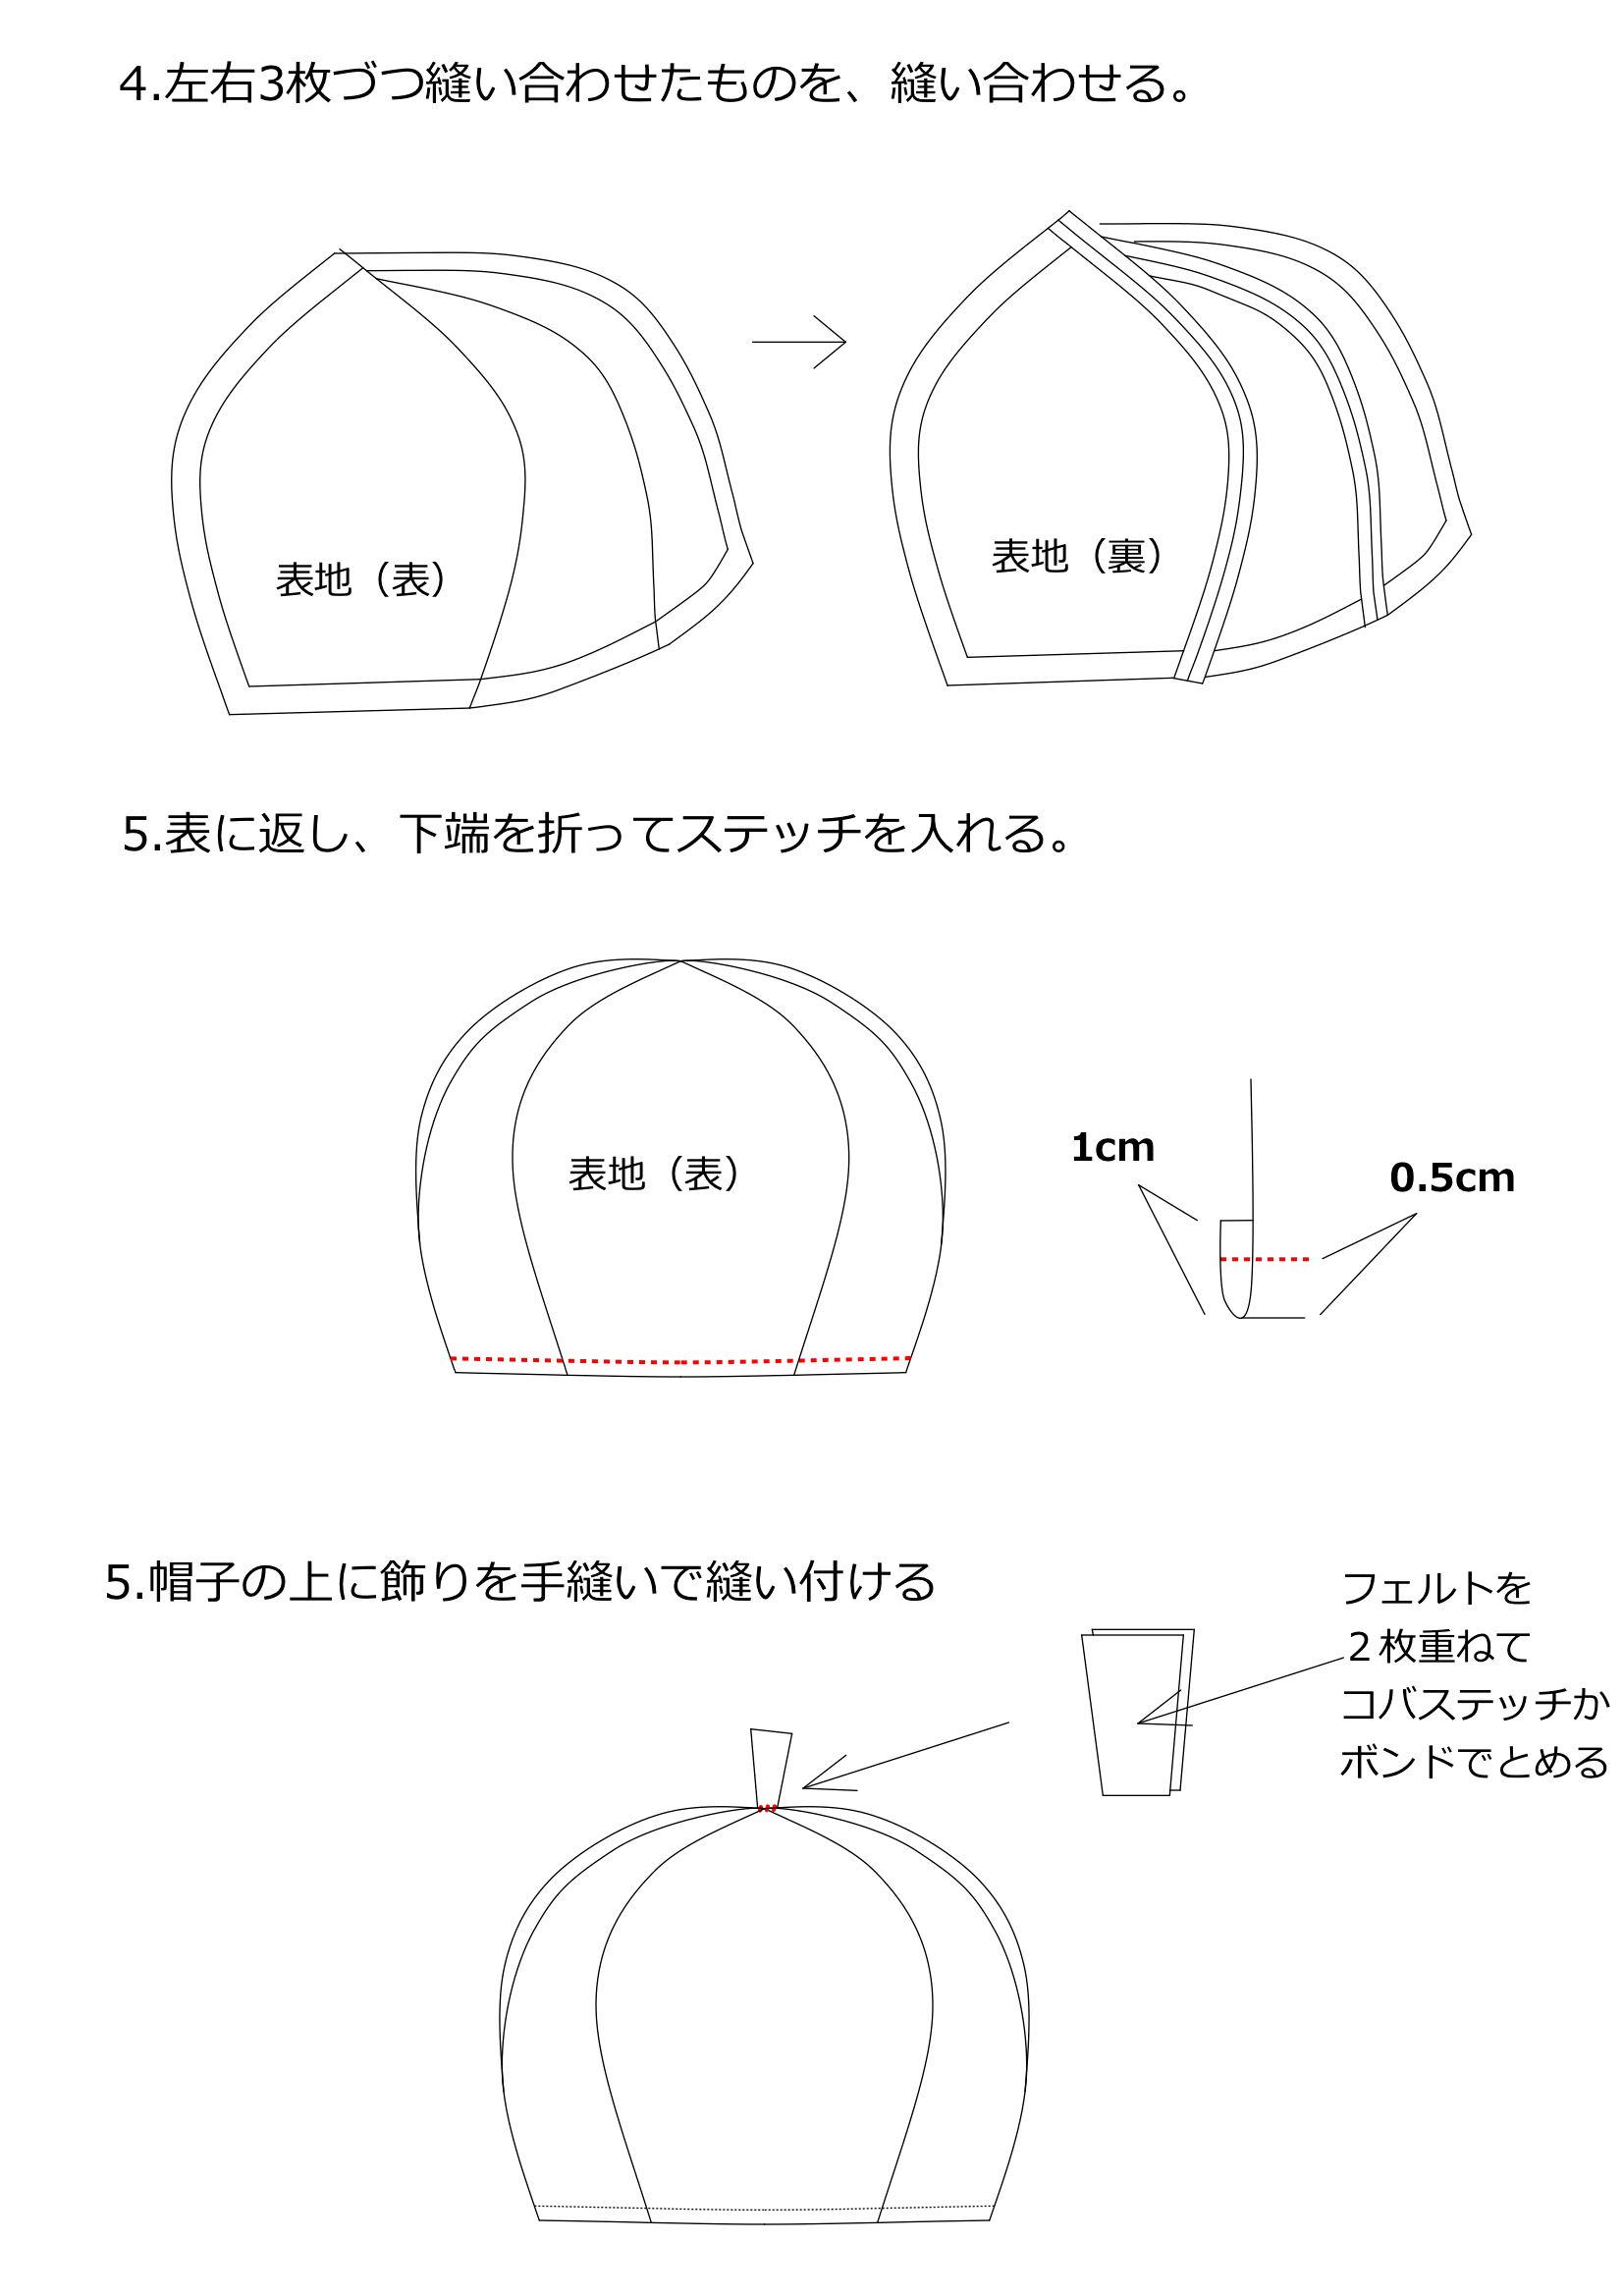
4. Join the two halves
Make two halves of three panels each, then join the halves.
5. Finish the lower edge
Turn right side out, turn the lower edge under by 1 cm (0.39 in) and stitch 0.5 cm (0.20 in) from the fold.
6. Make and attach the stem
Edgestitch or bond two felt stem layers together, then hand-sew the stem to the crown.
7. Add the pumpkin face
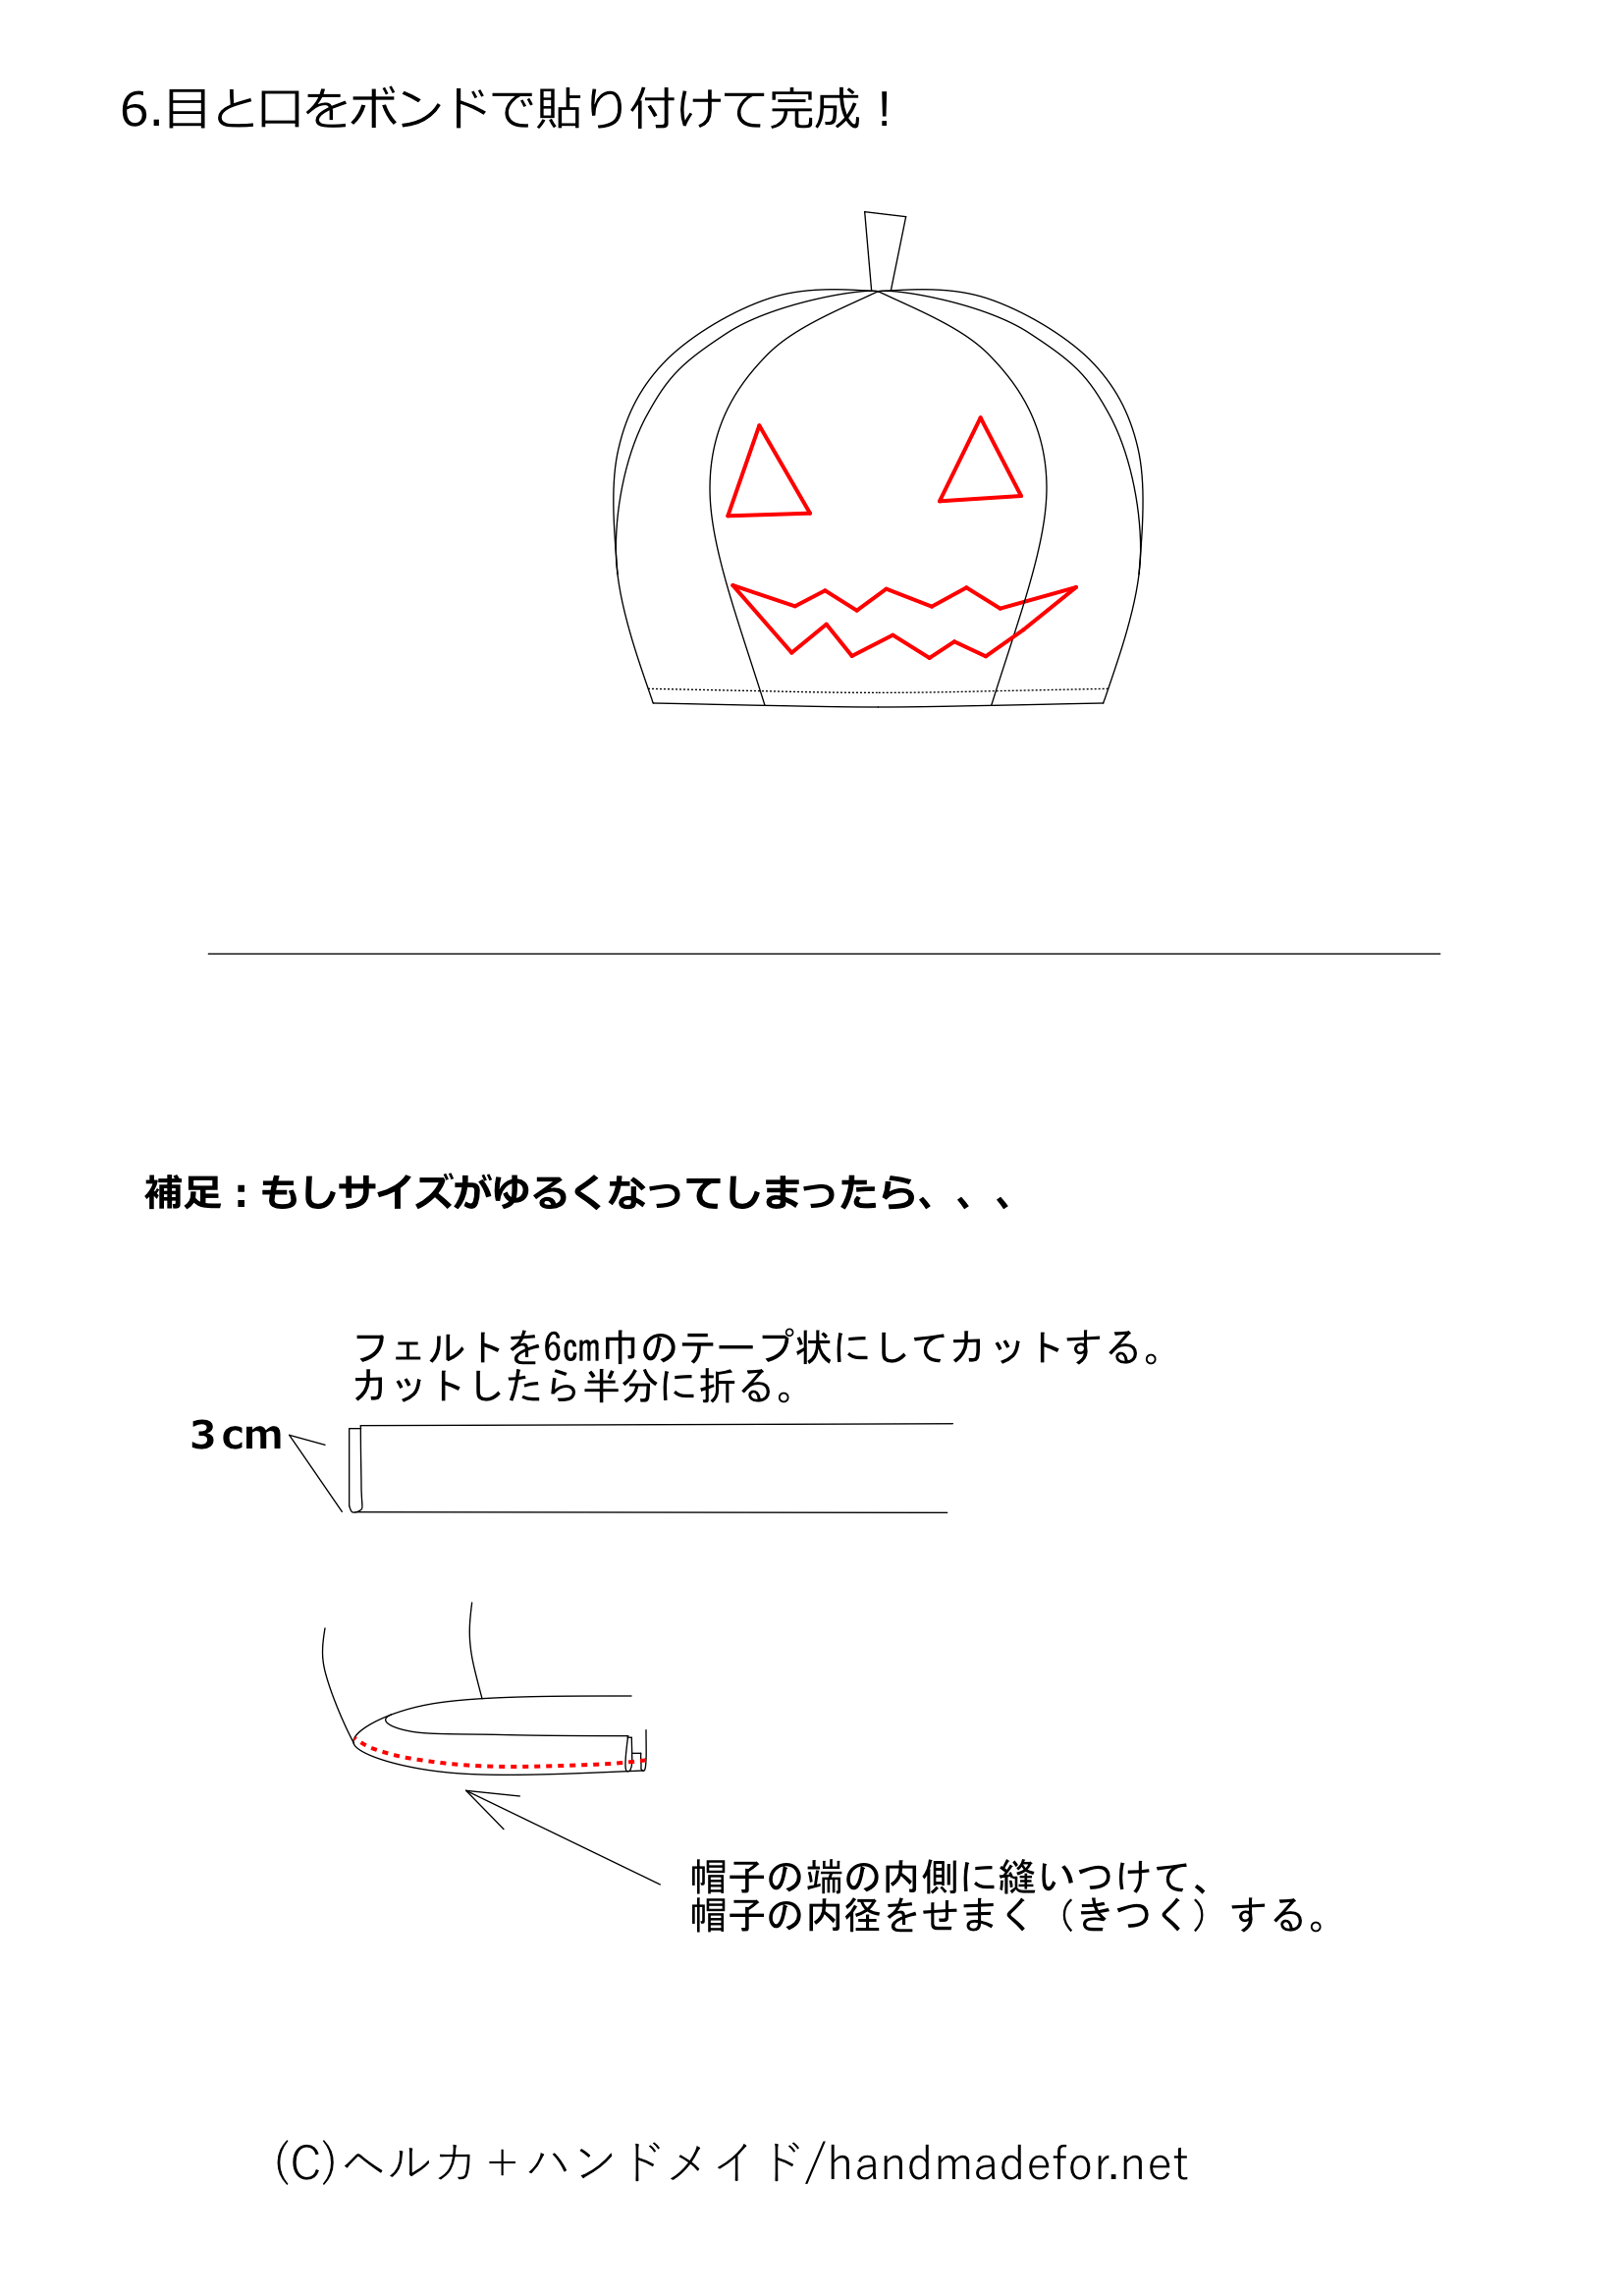
Attach the two eyes, nose and zigzag mouth using the supplied templates.
8. Optional: adjust a loose opening
If the hat feels loose, cut a felt strip 6 cm (2.36 in) wide and fold it to 3 cm (1.18 in). Fit the strip around the inside of the lower edge, trim it to the length you need and sew it in place.
Final checks
Check that seams and decorations are secure and the turned edges lie smoothly. Felt edges do not require overlocking.
Original pattern and diagrams: Helka Handmade. Tutorial adapted by Patternly, with permission.